Pre-cut lace wigs have become increasingly popular due to their ease of use and natural-looking appearance. However, to achieve a flawless and comfortable fit, proper securing and adjustment are essential. In this comprehensive guide, we will walk you through the step-by-step process of securing and adjusting a pre-cut lace wig for a perfect fit. Whether you are a beginner or a seasoned wig wearer, these tips will ensure that your lace wig looks natural and stays securely in place.

First, you need know the basics of pre-cut lace wigs.
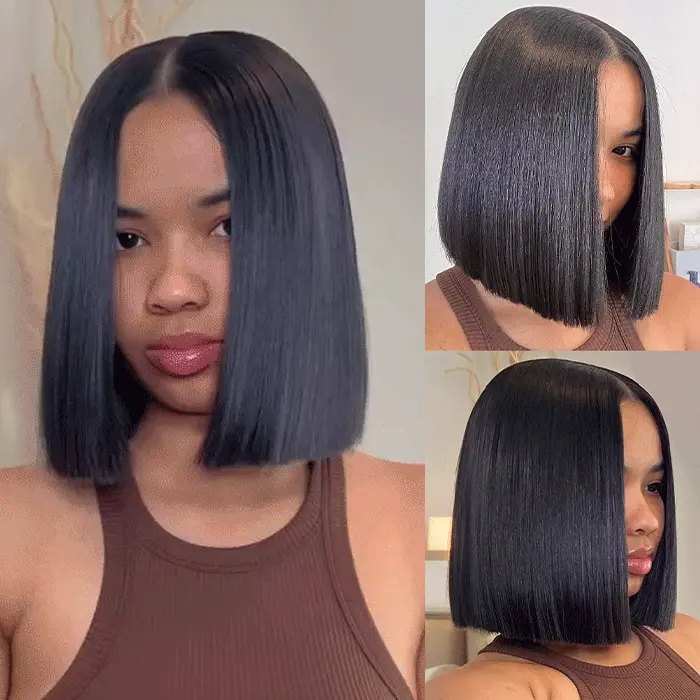
Before diving into the securing and adjustment process, it is essential to have a basic understanding of pre-cut lace wigs. These wigs feature a sheer lace material at the front, which mimics the appearance of the scalp when properly installed. Pre-cut lace wigs are pre-styled and come with a predetermined hairline, making them easier to wear for beginners.
Gather the necessary supplies.
To achieve the best results, gather the following supplies:
a) Pre-cut lace wig
b) Wig cap (optional but recommended)
c) Scissors
d) Adhesive (wig glue or tape)
e) Scalp protector
f) Alcohol wipes
g) Cotton balls
h) Wig clips or elastic bands (optional)
Prepare your natural hair.
For a seamless fit, ensure that your natural hair is neatly braided or flattened against your head. If you have long hair, consider putting it into cornrows or a low ponytail. Wearing a wig cap can also help to keep your hair in place and provide a smoother surface for the wig to adhere to.
Cleanse and protect your scalp.
Before applying any adhesive, cleanse your scalp using an alcohol wipe. This step removes any oils or residues that could hinder the adhesive’s effectiveness. Additionally, apply a scalp protector around the perimeter of your hairline to prevent any potential irritation from the adhesive.
Trim the lace.
Carefully trim the excess lace along the front of the wig. It’s crucial to leave a small amount of lace to avoid cutting too close to the hairline. Use small, precise cuts to achieve the most natural look.
Perform a test fit.
Place the pre-cut lace wig on your head without any adhesive to assess the fit. Ensure that the hairline aligns with your natural hairline, and the wig sits comfortably on your head. Make any necessary adjustments before moving on to the next step.
Choose your adhesive.
There are two main types of adhesives for securing pre-cut lace wigs: wig glue and wig tape. Wig glue provides a stronger hold and is ideal for long-term wear, while wig tape offers a more temporary solution. Choose the adhesive that best suits your needs and preferences.
Apply the adhesive.
If using wig glue, carefully apply a thin layer along the hairline using a small brush or applicator. For wig tape, cut it into small strips and apply them along the front and sides of the wig. Be cautious not to get adhesive on the hair strands.
Secure the wig.
Gently press the lace wig onto the adhesive, starting from the front and working your way back. Ensure that the wig aligns with your natural hairline and fits snugly on your head. Use a scarf or wig cap to hold the wig in place while the adhesive sets.
Adjust the wig for a perfect fit.
Once the adhesive has set, you can fine-tune the fit of the wig for maximum comfort and a natural appearance.
a) Ear tabs: Make sure the ear tabs of the wig align with your ears for a symmetrical look.
b) Hairline: Pluck a few baby hairs from the wig’s hairline to create a more realistic appearance. Be gentle and use tweezers to avoid damaging the wig.
c) Parting: If your wig has a parting, adjust it to match your desired style. You can also create a middle or side part for a different look.
d) Hair length: Trim the wig’s hair to your desired length, if necessary. Be cautious and take your time when cutting to avoid any mistakes.
e) Secure with clips or elastic bands: For extra security, you can sew wig clips or use adjustable elastic bands inside the wig to ensure a snug fit.
Do an Don’t when you install your pre-cut lace wig.
Dos:
Do cleanse and prepare your scalp: Before applying the wig, ensure that your scalp is clean and free from oils or residues. Use alcohol wipes to cleanse your scalp and apply a scalp protector to prevent any potential irritation from adhesives.
Do perform a test fit: Before applying any adhesive, try on the pre-cut lace wig to check the fit and alignment with your natural hairline. Make any necessary adjustments before securing it with adhesive.
Do trim the lace carefully: Trim the excess lace along the front of the wig with small, precise cuts. Leave a small amount of lace to avoid cutting too close to the hairline, ensuring a natural look.
Do choose the right adhesive: Select an adhesive that suits your needs and preferences. Wig glue provides a stronger hold for long-term wear, while wig tape offers a temporary solution.
Do apply adhesive correctly: Apply a thin, even layer of adhesive along the hairline using a brush or applicator. For wig tape, cut it into small strips and apply them along the front and sides of the wig.
Do press the wig gently onto the adhesive: When securing the wig, press it gently onto the adhesive starting from the front and moving towards the back. Ensure it aligns with your natural hairline and sits comfortably on your head.
Do adjust the wig for a perfect fit: After securing the wig, adjust the ear tabs to align with your ears, pluck baby hairs from the hairline for a realistic look, and create your desired parting style.
Do use wig clips or elastic bands for added security: If needed, sew wig clips or use adjustable elastic bands inside the wig for a more secure fit.
Don’ts:
Don’t rush the process: Installing a pre-cut lace wig requires patience and precision. Take your time to achieve the best results.
Don’t apply adhesive directly to the hair strands: Be cautious not to get adhesive on the wig’s hair strands, as it can damage the wig and affect its appearance.
Don’t use too much adhesive: Applying excessive adhesive can create a messy and uncomfortable installation. A thin, even layer is sufficient for a secure hold.
Don’t forget to test the adhesive on your skin: Before applying the adhesive on your scalp, do a patch test on a small area of your skin to check for any allergic reactions or sensitivities.
Don’t neglect your natural hair: Ensure that your natural hair is neatly braided or flattened against your head before putting on the wig. A wig cap can also help to keep your hair in place and provide a smoother surface for the wig to adhere to.
Don’t forget to adjust the wig for a natural look: Avoid leaving the wig’s hairline straight and unnatural. Pluck a few baby hairs and adjust the parting to achieve a more realistic appearance.
Don’t skip the scalp protection step: Applying a scalp protector helps to prevent potential irritation and damage to your skin caused by adhesives.
Don’t cut too much lace from the wig: Be cautious when trimming the lace to avoid cutting too close to the hairline. Leaving a small amount of lace ensures a natural-looking hairline.

Wrap up.
Securing and adjusting a pre-cut lace wig is an essential process to achieve a flawless and comfortable fit. By following these steps, you can enjoy a natural-looking wig that stays securely in place throughout the day. Remember to be patient and take your time during the adjustment process to avoid any mishaps. With the right techniques and supplies, you can confidently wear your pre-cut lace wig and embrace a stunning, head-turning look!